

|
Data Model - Overview |
|
iLeap's Data Model provides a simple & easy way to define data elements for any business application development. It defines relationships between data elements in the context of a Process & acts as central repository that stores all of the crucial data an organization can generate or consume. You can easily define & structure your data parameters that are required & measured in the processes using a Data Model. iLeap Platform allows you to create your own data model & multiple forms can be based on the same data model. Your data model provides the data to your forms and stores data received from them. Forms in turn are used as Process components. For more information on designing forms, see Forms. |
|
You can also define Master-Child relationships using a Data Model. You can create and store master data for reuse in different forms for different processes. Any existing Data Model can also be used as a data type for a new attribute. If this option is used with the current Data Model (Parent) in a form, the called Data Model (Child) would be available in its entirety in the new form. iLeap Platform offers its users a good insight & transparency to their Process Data since it stores them physically in a Data Model. Also, users have the ability to track the Process Data against each step of the execution of the process. |
|

| It is recommended to define your master data model(s) first before moving on to define your transaction based data model(s). |
| Contents |
| Data Model Types |
| iLeap allows you to create the following types of data model(s).
|
| Master Data Model |
| A Master Data Model is based on the master data that is relatively fixed, frequently used & which remains stable over a long period of time. The master data forms the core data representing the business objects around which the transactions are executed. Few examples that constitute master data are: customer, supplier, product, or location data. Master data models are used to store these infrequently changed master data. They generally do not store process related information, but keep support information related to processes. |

| Contents |
|
Scenario: For illustrative purposes, let us consider a sample example scenario of 'Travel Requisition Approval' in a company. For complete details on sample scenario along with sequence of steps, see Sample Scenario. |
| Previous | Back to Contents | Next |
Creating a new Master Data Model
|
For the 'Travel Requisition Approval' App, we first need to define the requisite data elements to store the App associated crucial data. To start with, let us begin by creating the requisite Master Model such as Country Info Master. Following are the data parameters or model attributes required to create the new master model 'Country Info Master'.
|
| To create a new Master Data Model, follow these steps: |
1. On the Data Model tab, click Create Data Model.
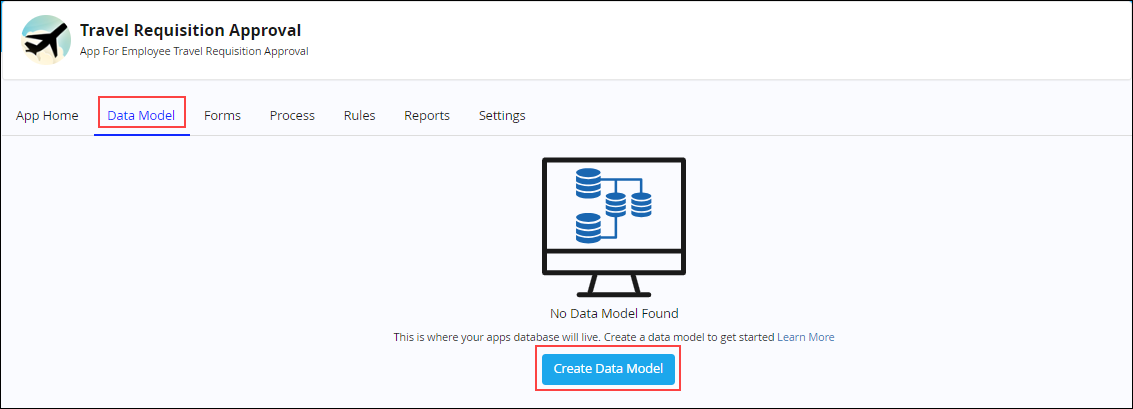
2. The Create Model dialog box appears.

3. Select the type of data model you wish to create. Click Master Data Model.

4. Click Next. The following dialog box appears.
![]()
- Enter the name for the data model in the Data Model Name box.
- Enter the display name you wish to in the Display Name box.
- Enter an appropriate description in the Description box.
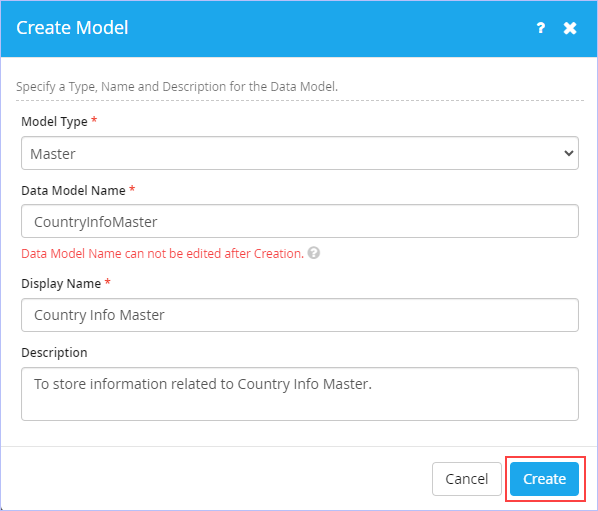
5. Click Create. The following page appears.
![]()
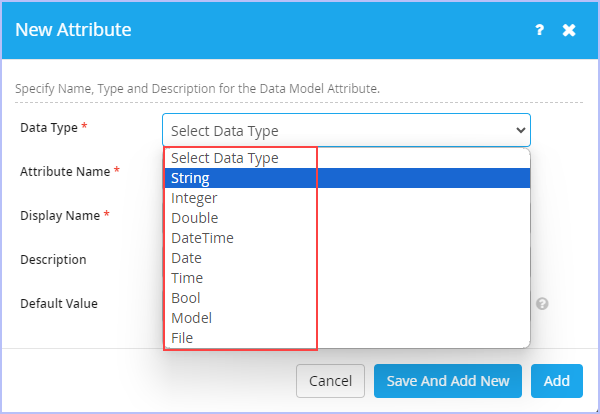
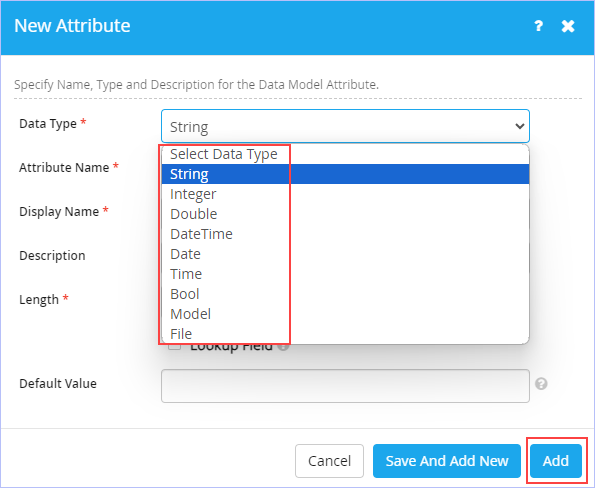
6. Click Create Attribute. The New Attribute dialog box appears.
![]()
- Select the data attribute type from the Data Type list. The available options are: String, Integer, Double, DateTime, Date, Time, Bool, Model & File. For more information on various types of data attribute types, see Data Attribute Types.
- Enter the name of the Attribute in the Attribute Name box.
- Enter the corresponding display name you to in the Display Name box.
- Enter an appropriate description for the attribute in the Description box.
- Enter the value in the Length box. This field appears only, if you select ‘String’ as the data attribute type. You can enter up to 200 characters by default. However, the length range is between 1 & 2000. Select the Max Size check box to accommodate unlimited number of characters if you wish to.
-
Select the Lookup Field check box, if you wish to show the form control as a drop-down list or Option buttons with multiple values in a form in the Form Designer. This field appears only, if the selected data type is String or Integer or Bool. Notice that on selection of Lookup Field check box, the Default Value box would be unavailable.
- Enter a default value you wish to provide to this attribute in the Default Value box. Else, leave as it is.
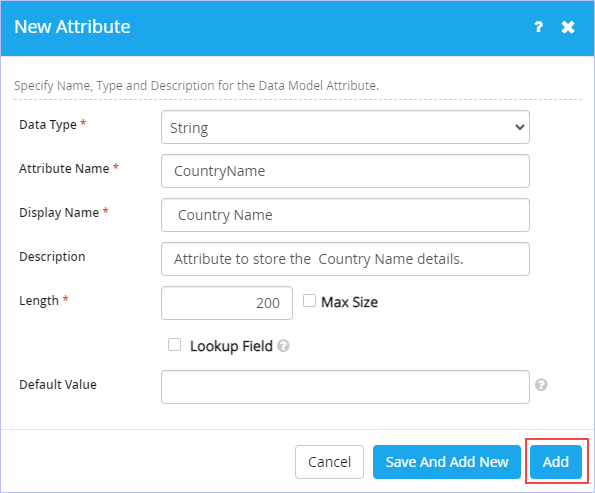
7. Click Add to add this attribute to the master data model created. Observe that the newly created attribute along with its details is displayed as shown. Similarly, you can add any number of relevant attributes to your newly created master data model.
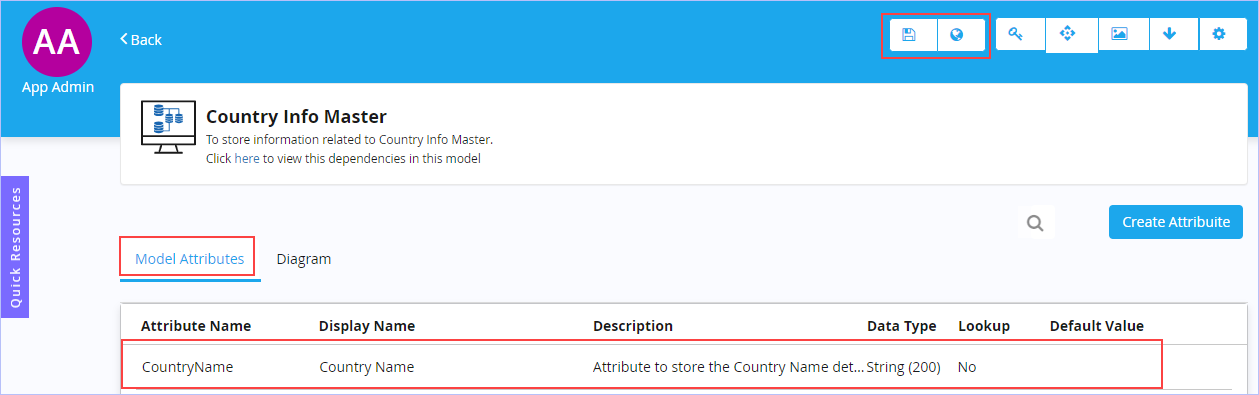
8. Similarly, you can go on and create additional model attributes you wish to. Once all the relevant model attributes are added to the master data model, click ![]() to Save this data model. Else, click
to Save this data model. Else, click ![]() to Save & Publish data model at once. For more information on the options available on the toolbar, see Toolbar Options.
to Save & Publish data model at once. For more information on the options available on the toolbar, see Toolbar Options.
9. Immediately, ‘Success! Model saved successfully’ message is displayed at the top, if you choose to save the model. If you choose to save and publish your data model at once, the following Confirmation dialog box appears. Click Yes if you are sure to do so.

10. Immediately, yet another Confirmation dialog box appears as shown.
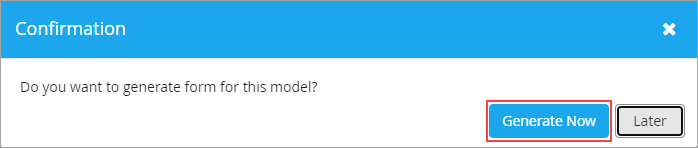
- Click Generate Now if you wish to generate a form for this model. Else, click Later if you wish to generate at a later time.
- If the Later option is chosen, "Success! Model published successfully" message appears.
11. If you have chosen to save only, then click Back at the top left side of this page to navigate to the previous screen to view the newly created master model attribute along with its details. Alternatively, you can navigate back to the previous screen on your web browser & view the same.
If you have chosen to Save & Publish your master data model, the following page appears.

| The 'Country Info Master' master data model with all its defined model attributes is shown below. |

|
|
|
iLeap allows you to define a master model with parent-child relationship up to one level. |
To enter information in the master data model, see entering master model data.
| Previous | Back to Contents | Next |
Data Model Workspace or Listing Area
|
This is the primary workspace area that appears immediately after creating any type of data model. You can create model attributes and view your model diagram from here. You can quickly search your defined model attributes too. You can also display your defined data model's attributes in either List View or Tile View. You can switch or toggle between any of these views any time. |
| To toggle between the displays of your data model, follow these steps: |
- On the Data Model tab, click
 .
.
List View:

Tile View:

| Previous | Back to Contents | Next |
Editing a Master Data Model
| You can edit a master data model at any time even after its publication as well. Except its name, you can edit any of its attributes (in draft/editable state) before being published. You can add any number of relevant additional model attributes to a data model at any point even after publishing it. |
| To edit a Master Data Model, follow these steps: |
1. On the Data Model tab, hover the mouse pointer on any published master model & click
![]() to edit it. Alternatively, open the published master data model you wish to edit & click
to edit it. Alternatively, open the published master data model you wish to edit & click
![]() on the toolbar to edit it.
on the toolbar to edit it.

2. Make the requisite modifications & then save or publish the data model as needed.
|
|
| Previous | Back to Contents | Next |
Deleting a Master Data Model
| A Master Data Model once published cannot be deleted either. However, you can delete its attributes only when it is in draft/editable state. Once the data model is published, you no longer will be able to do so. |
| Previous | Back to Contents | Next |
Transaction Data Model
|
A Transaction data model is used for storing & retrieving transaction information. The transaction data is relatively temporary & stored at various stages of a business process. Few examples of transaction data include: Customer Orders, Customer Payments, Purchase Orders, Production Orders, Goods Movements etc. Unlike master data, the transaction data is dynamic in nature, since each business transaction is unique & changes with every business transaction. A transaction data model typically shows the relationship between database tables that contain information about transactions. To know more, see Managing a Transaction Data Model. |
Creating a new Transaction Data Model
|
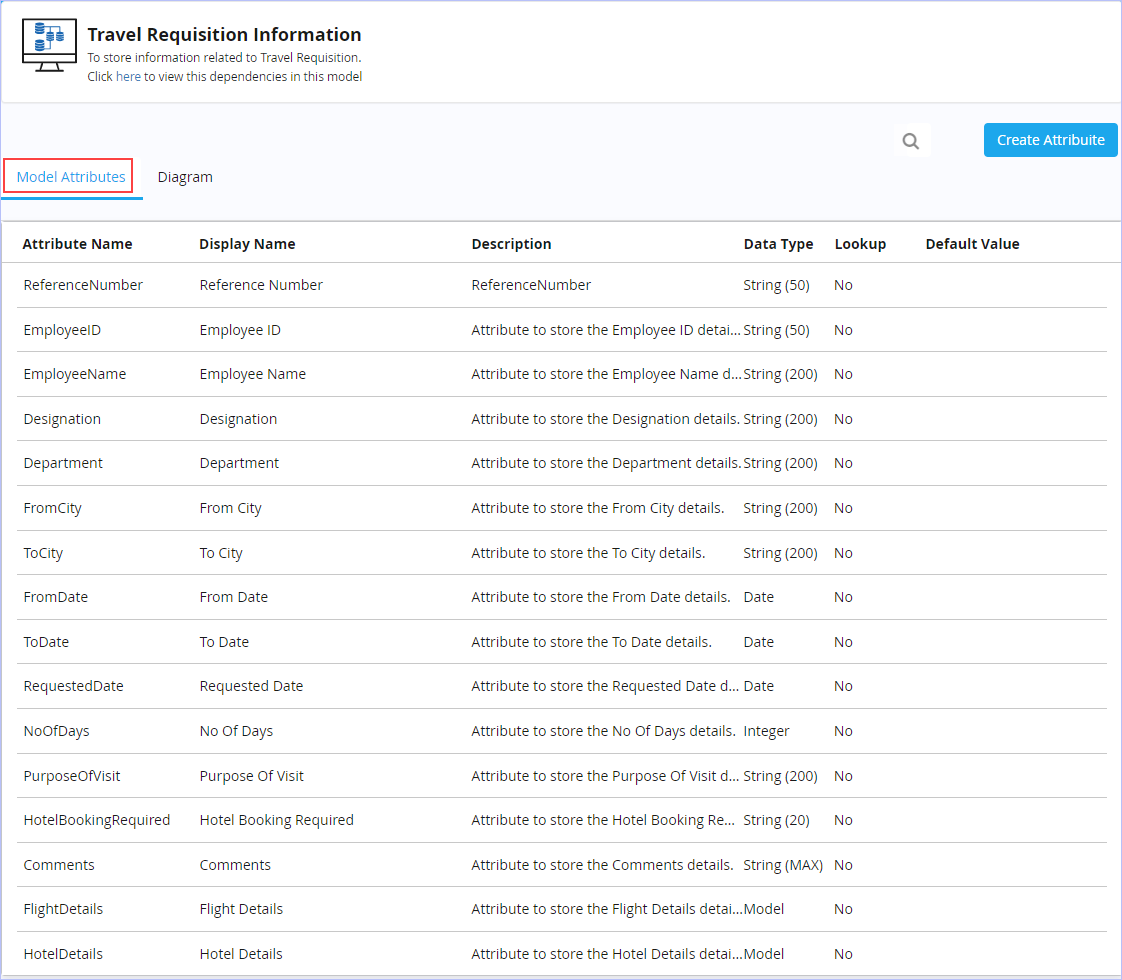
After creating the requisite master models, we proceed towards creating few transaction models that are required for our example 'Travel Requisition Approval' App. For illustrative purposes, we will first create a parent transaction model namely 'Travel Requisition Information' followed by two child transaction models namely 'Hotel Information' and 'Flight Information'. Following are the data parameters or model attributes required to create the new transaction model 'Travel Requisition Information'.
The procedural steps for creating the two child transaction models namely 'Hotel Information' and 'Flight Information' are not illustrated here since they are very much similar to creation of parent transaction model 'Travel Requisition Information' & hence not repeated. |
| To create a new Transaction Data Model, follow these steps: |
1. On the Data Model tab, click Create Data Model.
![]()
2. The Create Model dialog box appears.
3. Select the type of data model you wish to create. Click Transaction Data Model.
![]()
4. Click Next. The following dialog box appears.
![]()
- Enter the name for the transaction data model in the Data ModelName box.
- Enter the display name you wish to in the Display Name box.
- Enter an appropriate description in the Description box.

5. Click Create. The following page appears.
![]()
Notice that a model attribute by name 'Reference Number' with the data type 'String' with a character length of 50 is already created by default.
6. Click Create Attribute. The New Attribute dialog box appears.
![]()
- Select the data attribute type from the Data Type list. The available options are: String, Integer, Double, DateTime, Date, Time, Bool, Model & File. For more information on various types of data attribute types, see Data Attribute Types.
- Enter the name of the Attribute in the Attribute Name box.
- Enter the corresponding display name you to in the Display Name box.
- Enter an appropriate description for the attribute in the Description box.
- Enter the value in the Length box. For example, 50. This field appears only, if you select ‘String’ as the data attribute type. You can enter up to 200 characters by default. However, the length range is between 1 & 2000. Select the Max Size check box to accommodate unlimited number of characters if you wish to.
-
Select the Lookup Field check box, if you wish to show the form control as a drop-down list or Option buttons with multiple values in a form in the Form Designer. This field appears only, if the selected data type is String or Integer or Bool. Notice that on selection of Lookup Field check box, the Default Value box would be unavailable.
- Enter a default value you wish to provide to this attribute in the Default Value box. Else, leave as it is.

7. Click Add to add this attribute to the transaction data model created. Observe that the newly created attribute along with its details is displayed as shown. Similarly, you can add any number of relevant attributes to your newly created transaction data model.

8. Similarly, you can go on and create additional model attributes you wish to. Once all the relevant model attributes are added to the transaction data model, click
![]() to Save this data model. Else, click
to Save this data model. Else, click
![]() to Save & Publish data model at once. For more information on the options available on the toolbar, see Toolbar Options.
to Save & Publish data model at once. For more information on the options available on the toolbar, see Toolbar Options.
9. Immediately, ‘Success! Model saved successfully’ message is displayed at the top, if you choose to save the model. If you choose to save and publish your data model at once, a Confirmation dialog box appears prompting you to generate the model for this form immediately or at a later time.
- Click Generate Now if you wish to generate a form for this model. Else, click Later if you wish to generate at a later time.
- If the Later option is chosen, "Success! Model published successfully" message appears.
10. If you have chosen to save only, then click Back at the top left side of this page to navigate to the previous screen to view the newly created transaction model attribute along with its details. Alternatively, you can navigate back to the previous screen on your web browser & view the same.

| The 'Travel Requisition Information' transaction data model with all its defined model attributes is shown below. |
|
|
| Previous | Back to Contents | Next |
Data Attribute Types
The table below lists each of the attribute data types supported in Data Model.
| Data Attribute Name | Definition | |
| String | Data field with only alphabets and combination of alphabets and numbers | |
| Integer | Data field with only Numbers (with a Maximum Numeric value limit 999999999999). You can even choose the format of this attribute type. Supported format types: 999,999 & 9,99,999) | |
| Double | Data field with decimal values | |
| DateTime | Data field with Date and Time defined | |
| Date | Data field with only date defined | |
| Time | Data field with only time defined | |
| Bool | Data field used to indicate one of two values (True or False) | |
| Model | Used to associate with other existing model | |
| File | Used to store file details | |
| Previous | Back to Contents | Next |
Toolbar Options
| To | Action | |
| Edit Data Model | Click |
|
| Save Data Model | Click |
|
| Save and Publish Data Model | Click |
|
| Add Constraints | Click |
|
| Enable API | Click |
|
| Export Data Model | Click |
|
| Import Model Attributes | Click |
|
| Set Data Model Properties | Click |
|
| Previous | Back to Contents | Next |
Setting Data Model Properties
| Data Model allows you to set few generic properties through the Data Model Properties dialog box. |
| To set the generic properties of a Data Model, follow these steps: |
1. Open any data model for which you wish to set the properties. For example, 'Travel Requisition Information'. Note that the name of the data model cannot be edited.
2. On the toolbar, click
![]() . The Data Model Properties dialog box appears.
. The Data Model Properties dialog box appears.
3. On the Generic tab, modify the Display Name in the Display Name as required.
4. Key in the model description as appropriate in the Description box.
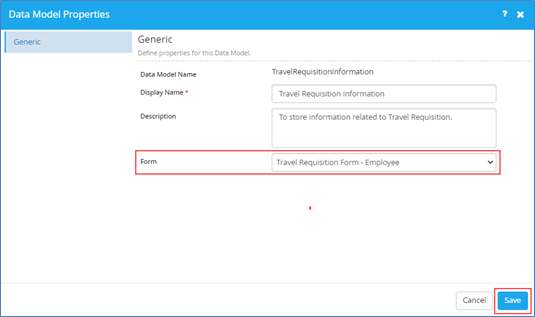
5. Select the form from the Form drop-down list. For example: Travel Requisition Form – Employee. Only published forms appear on this drop-down list.
6. Click Save to save the changes made.
|
|
| Previous | Back to Contents | Next |
Editing a Transaction Data Model
| You can edit a transactional data model at any time even after its publication as well. Except its name, you can edit any of its attributes (in draft/editable state) before being published. You can add any number of relevant additional attributes to a data model at any point even after publishing it. |
| To edit a published transactional data model, follow these steps: |
1. On the Data Model tab, hover the mouse pointer on any published transaction model & click
![]() to edit it. Alternatively, open the published transaction data model you wish to edit & click
to edit it. Alternatively, open the published transaction data model you wish to edit & click
![]() on the toolbar to edit it.
on the toolbar to edit it.
2. Make the requisite modifications & then save or publish the data model as needed.
|
|
| Previous | Back to Contents | Next |
Deleting a Transaction Data Model
| Any Data Model, be it a Master or Transaction once published cannot be deleted either. However, you can delete its attributes only when data model is in draft or editable state. Once the data model is published, you no longer will be able to do so. |
| Previous | Back to Contents | Next |
Viewing Model Diagram
| Data Model allows you to view the model diagram associated with any created data model. |
| To view the model diagram of your defined data model, follow these steps: |
1. Open the data model for which you wish to view its model diagram. For example, Travel Requisition Information.

2. Click Diagram to view the corresponding model diagram.

|
The view only model diagram reflects the associations between Parent Model and Child Model, if any. You can still view the model diagram, even if there is no child model associated with the model selected. |
| Previous | Back to Contents | Next
Enabling API >> |
Enabling API
| While building an app, iLeap reveals various APIs associated with it. As an app developer, you can enable the APIs associated & allow it to be consumed by any developer outside of iLeap to seamlessly integrate his/her application with iLeap Platform. |
| Previous | Back to Contents | Next |
Exporting Data Model
|
You can export any data model (master or transaction) to view it in various diverse formats such as JPEG, PNG, SVG and JSON. |
| To export your data model, follow these steps: |
1. Open the data model you wish to export. On the toolbar, click
![]() to export.
to export.
2. The Export as..dialog box appears.

3. Select the format in which you would like your data model to be exported from the Export Format list. The available options are : JPEG, PNG, SVG & JSON
4. Click Export. Immediately, your data model is downloaded in the chosen export format on to your system location (Downloads folder) having the same name as your chosen data model.
| Previous
<< Enabling API |
Back to Contents | Next |
Viewing the Usage of the Data Model
|
Data Model allows you to view the information related to the usage or dependencies of specific iLeap components such as Forms and Process in any data model at any point in time. |
| To view the dependencies of iLeap components in any data model, follow these steps: |
1. On the Data Model tab, hover the mouse pointer on any published model for which you wish to view & click the
![]() icon.
icon.

2. The Data Model Usage dialog box appears.
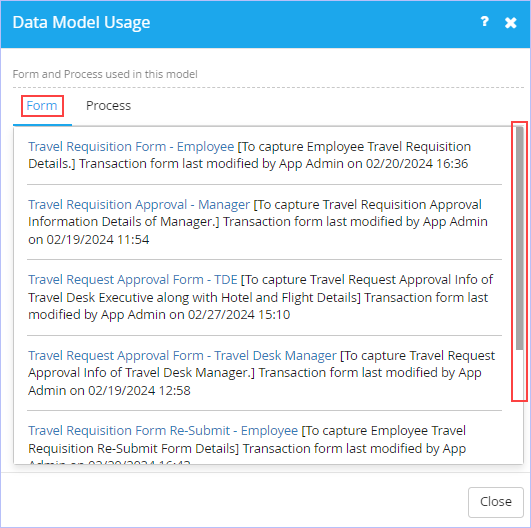
- Notice the display of form(s) along with details used in the Model under the Forms tab.Click on the form name to directly navigate to the selected form.
- Similarly, navigate to the Process tab to view the process name associated with the model. Click on the displayed process name to instantly view the Process flow diagram associated.
3. Click Close.
| Previous | Back to Contents | Next |
Sharing the Model Data
| Data Model allows you to share your valuable model data with any other App(s) in your organization. |
| To share your model data with any other App(s) in your organization, follow these steps: |
1. On the Data Model tab, hover the mouse pointer on any published data model you wish to share with other App(s). Click
![]() .
.

2. The Share dialog box appears displaying all the published App(s) of your Orgnisation.
3. Under the Organisation Level Apps section, select the App(s) for which you wish to share your model data with & select the requisite model access permission Read or Read and Write from the list displayed.
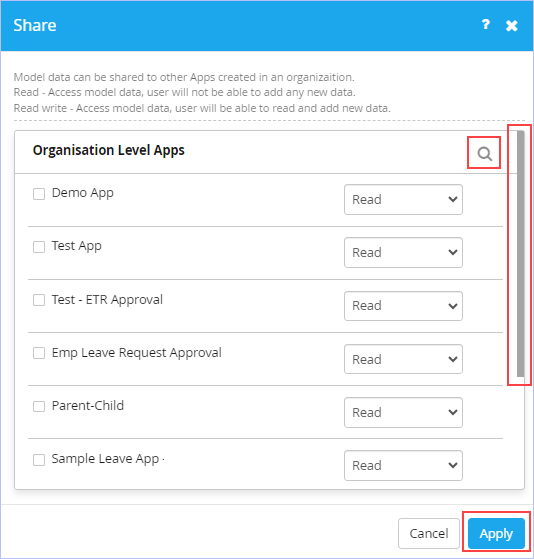
4. Click Apply.
|
You can also quickly search the apps for which you wish to share the chosen data model. |
| Previous | Back to Contents | Next |
Entering Master Model Data
| Once you have defined a new Master Data Model, you need to ensure keying its relevant details. |
1. On the Data Model tab, hover the mouse pointer on any published master data model for which you wish to enter its master data.

2. Click the View data![]() icon. The following page appears.
icon. The following page appears.
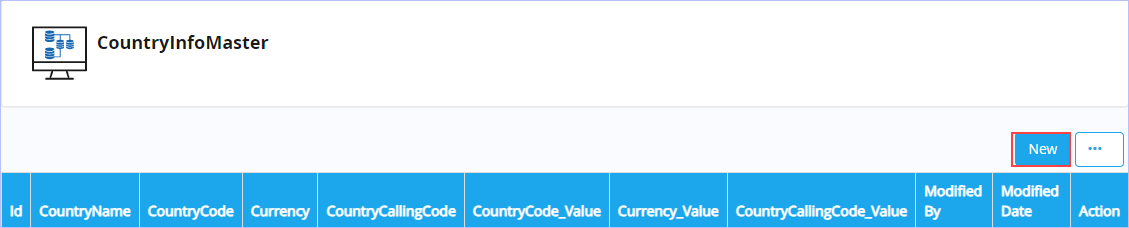
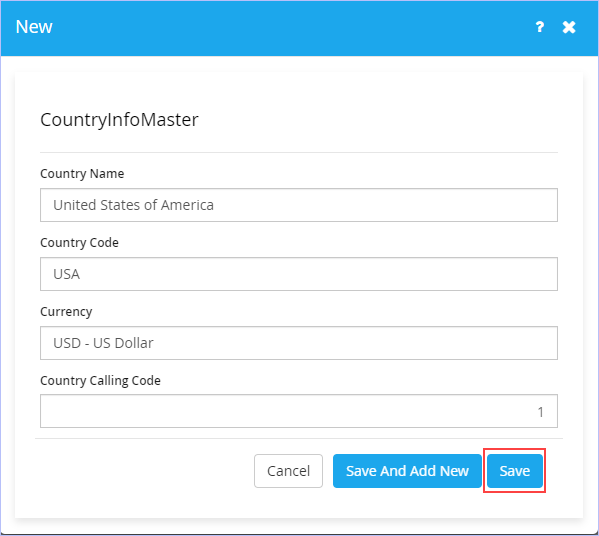
3. Click New. The following New dialog box appears.
![]()
- Enter the name of Country in the Country Name field.
- Enter the Country Code in the Country Code field.
- Enter the Currency of the Country in the Currency field.
- Enter the Calling Code of the Country in the Country Calling Code field.
- Click Save to save the entries made. Immediately, ‘Success. Record saved successfully’ message appears. Click OK. Else, Click Save And Add New to save the entries made and clear the fields in the dialog box to make additional new entries.
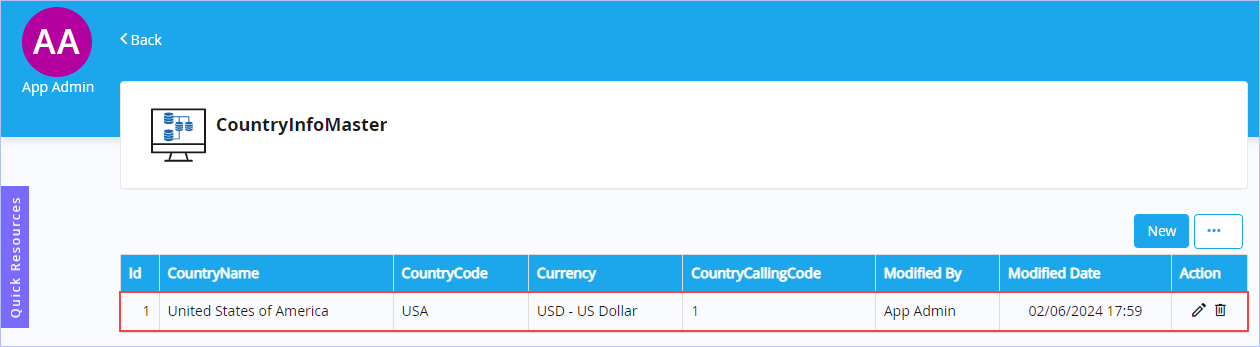
Notice that the newly added record with its details is displayed as shown. Similarly, you can add any number of master entries to your master model.
The 'Country Info Master' master data model with few sample entries is shown below.
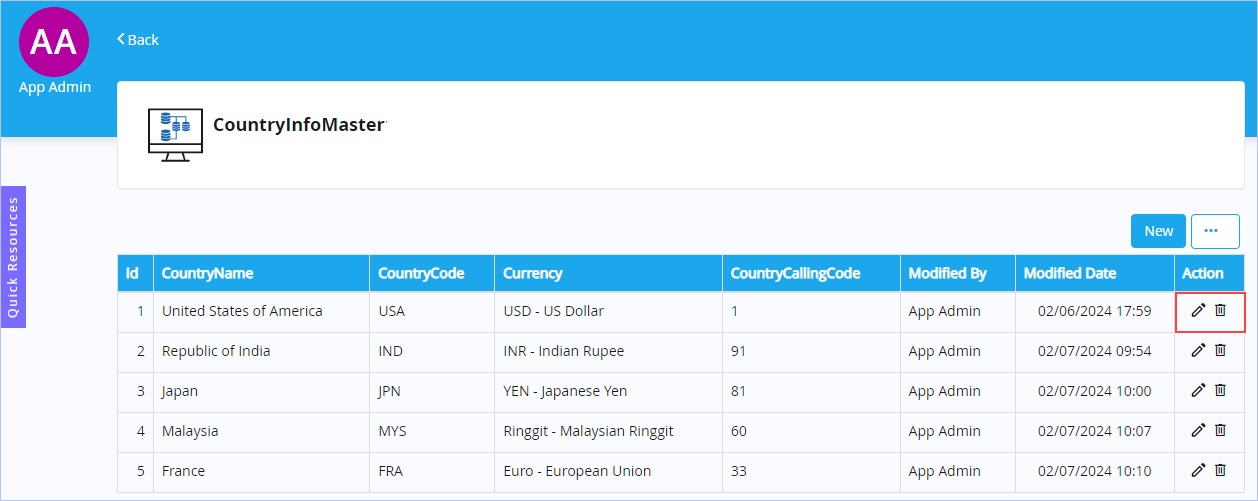
Notice that you can edit as well as delete the master record entries made.
|
If the master data model is published, but its corresponding model form is not generated yet, you may notice the generate form |
| Previous | Back to Contents | Next
More Options >> |
More Options:
1. On the selected master model page, click the ![]() icon to display the short-cut menu as shown.
icon to display the short-cut menu as shown.
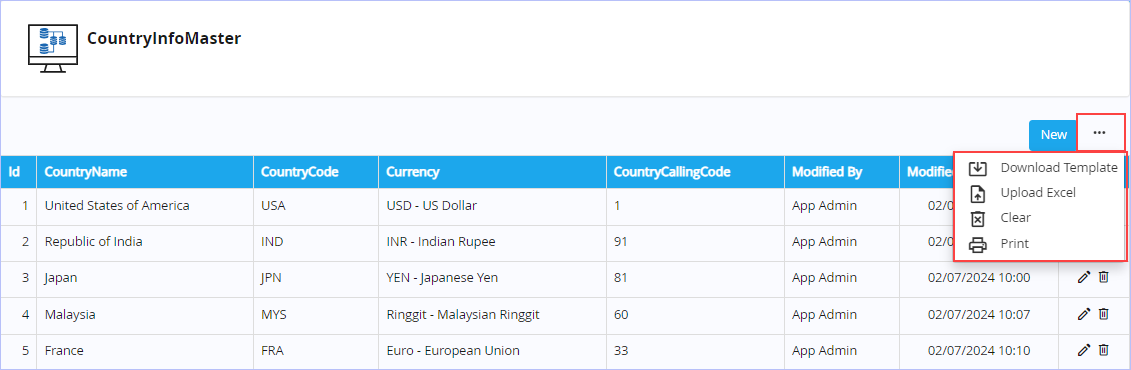
2. From the short-cut menu displayed, you can:
- Click Download Template to download a spreadsheet template named ‘DataImportTemplate.xlsx’ in your local Downloads folder. This spreadsheet template is an exact replica of the master model attributes defined (blank) to key in your master data entries.
- Click Upload Excel to upload a spreadsheet from a location.
- Click Clear to delete all the master model entries made. Click Yes on the Confirmation dialog box that appears. Immediately, ‘Success! Model data cleared successfully’ message appears.
- Click Print to print the Master Model if you wish to.
| Previous | Back to Contents |